Saturday, December 10, 2011

Tea Leaf Eggs


Chinese tea leaf eggs are so easy to make at home.  Eggs were on sale so I decided to make a batch of slowly simmered flavored eggs to share them with my family.  My kitchen was filled with a wonderful aroma of spices after cooking them in slow cooker for 2-3 hours.

Tea Leaf Eggs
Adapted from here and there


Ingredients:
6-8 large eggs
2 T loose black tea leaves or 2 black tea leaves bags
2 star anise
1 cinnamon stick
2-3 cloves
1 tsp five spice powder
1 tsp sugar 
4 tbsp soy sauce 
Roughly 2 cups water

Directions:
1.  Prepare hard boiled eggs in a saucepan.
2.  Carefully tap the eggshells with the back of a spoon to let the flavors seep through the eggs and to create a marbled like appearance when cooked.
3.  Arrange eggs in one layer at the bottom of the slow cooker then add just enough water to cover the eggs along with the rest of the ingredients.  Set the slow cooker on high and let simmer for about 2-3 hours. 

You can cut the eggs in half and serve it with the brew or eat as is.  Enjoy

Sunday, December 4, 2011

Dan Dan Noodles


After one year since my unsuccessful attempt at making dan dan noodles, I decided to give it another try.  Dan Dan Noodles  (担担面) is a Chinese Sichuan dish consisting of a spicy sauce with minced pork and preserved vegetables served over noodles.  All the recipes I found were so different so I just adapted to several recipes into one.  This home-made version satisfied my dan dan noodle cravings for now. 


Dan Dan Noodles  
Serves 4

Ingredients:

Cooking oil
1 lb. ground pork
1/2 T low-sodium soy sauce
2 tsp Shaoxing rice wine
1 tsp sesame oil
1/2 onion, diced
3 T garlic, minced
2 T ginger, minced
2 T peanut butter
1 1/2 T light soy sauce
1/2 T dark soy sauce
2 T chili oil
1 T Sichuan peppercorns (toasted & ground)
1 cup low-sodium chicken broth
1 pound noodles

Garnish:
Crushed roasted peanuts
Chopped green onions

Directions:
1. Mix pork, soy sauce, rice wine and sesame oil.  Set aside and let marinade for 15 minutes.
2. Heat a large wok or skillet on medium high heat. Add oil and brown until no longer pink then set aside.
3. Return wok to heat, add oil and saute onions until tender.
4. Add the garlic and ginger and saute until fragrant.
5. Add the peanut butter, soy sauce, chili oil, chili sauce, sesame oil, Sichuan peppercorns and chicken stock and simmer for 5-7 minutes.
6. Add the pork and remove from the heat.
7. Prepare the noodles according to package instructions. Place noodles on a plate and pour some of the pork  mixture over the noodles.
8. Garnish with chopped peanuts and green onions, and serve.

Sources:
Closet Cooking
World Foodie Guide
Smoky Wok
Appetite for China

Monday, September 26, 2011

Labour Day, Vancouver, B.C.


Hubby and I went to Vancouver, B.C. over the Labor Day weekend for a foodie getaway. We headed straight to Motomachi Shokudo for some yummy ramen after checking into our hotel. It turns out Kintaro Ramen was only a few doors down from Motomachi.  Luckily, our wait at Motomachi was less than 5 minutes compared to the long line snaking out the door from Kintaro.  I ordered the New Generation Miso Ramen with bean sprouts, menma, onions, Japanese leek (lots of it), corn, BBQ pork, and green onions.  The soup was very tasty and the pork was very good with a nice grilled flavor. Hubby ordered their specialty Bamboo Charcoal Ramen with soft poached egg, menma, Japanese leek, BBQ pork, and green onions. The broth was mixed in with bamboo charcoal powder which explains the black color and claims to be healthy for you.


We really enjoyed the ramen at Motomachi and can't wait to go back. We took a stroll along Robson after dinner and stumbled upon Guu on Thurlow.  They were open late so we decided to try some izakaya dishes before heading back to the hotel.  They even make their own beer called Guuu'd Ale. One bottle costs $8.50!  We skipped the drinks and just ordered a few dishes to nibble. We had the takoyaki, tako wasabi, karaage and pork intestine. The takoyaki could have used a bit more octopus, otherwise, the food was okay.


Since we were surrounded by Chinese restaurants in Richmond we decided to grab dim sum for breakfast the following day.  We went to Fisherman's Terrace in Aberdeen Center and were one of the few early birds there. The service was very efficient and attentive. As soon as we were seated, we looked through the menu and marked what we wanted on the order sheet (they didn't push carts around like most dim sum restaurants typically do). The food was good but I don't think I would make a special trip back there next time we're in the area.  Hubby said he would go back just for the sticky rice.

After breakfast, we went back to the hotel to check out and decided to get some xiao long bao (soup dumplings) from Shanghai River. I was craving soup dumplings very badly but we were turned away when we got to the restaurant. Apparently, reservations are required in order to eat there. :(

Our failed attempt to eat at Shanghai River set us back on time. We originally planned to tandem bike around Stanley Park after breakfast, grab a late lunch and get gelato before heading back home. We had to forgo biking and went to eat lunch instead at Miura Waffle Milk Bar. What can I say, I love my waffles!  Since we wanted to save room for gelato, we decided to share a savory waffle sando (short for "sandowichhi," Japanese for sandwich). We ordered the bulgogi with beef, egg sauce, kimchi and bulgogi sauce. I wished the waffle was crispier but the sandwich itself was good. I would like to try tiramisu waffle sando next time.


We couldn't have picked a better day to go to Vancouver. The weather was beautiful and so perfect for a nice cold treat at Yaletown Gelato. We ordered a piccolo size consisting of two scoops gelato - blood orange and hazelnut. And that concludes our 24 hour food adventure.  

Saturday, September 17, 2011

Parmesan Garlic Pita Chips with Roasted Red Pepper Hummus


It's starting to feel chilly around here and I don't like it one bit. I'm not ready to say goodbye to summer! I want to do more BBQ's and picnics. The photo above was taken in July when we had our first and only picnic this year at Discovery Park in Magnolia. I believe the park is the largest in Seattle. We didn't explore much due to time constraints (we got there at 7pm), but we did manage to find a nice spot overlooking Puget Sound to have our picnic. I made pita chips and hummus to accompany our sandwiches and they were so addictive. Who needs to buy pita chips when you can make it at home yourself?  You just need pita bread and a few basic ingredients. Same with the hummus and they go so well together. 


Parmesan Garlic Pita Chips

Ingredients
4 whole wheat pitas
2-4 T olive oil
1 tsp garlic powder
1 tsp Italian seasoning
Grated parmesan cheese

Directions:
Preheat oven to 400° F. Cut the pita rounds into 8 wedges. Toss the pitas with olive oil, parmesan, garlic powder, Italian seasoning, salt and pepper if desired, and place on baking sheet. Bake until golden brown and crisp, about 8-10 minutes. Monitor the pita chips in the oven because they burn easily. Remove from oven and let cool.

Roasted Red Pepper Hummus
Adapted from All Recipes

Ingredients:
1 can garbanzo beans, rinsed and drained
1 (4 oz) jar roasted red peppers
3 T  lemon juice
1 1/2 T tahini
1 T olive oil
2 clove garlic
1/2 tsp ground cumin
1/2 tsp cayenne pepper
1/4 tsp salt


In a food processor, puree the chickpeas, red peppers, lemon juice, tahini, olive oil, garlic, cumin, cayenne, and salt. Process, using long pulses, until the mixture is smooth. Make sure to scrape the mixture off the sides of the food processor in between pulses. Transfer to a serving bowl and refrigerate for at least 1 hour.

Sunday, September 11, 2011

Blueberry Cream Chese Scones


Blueberries remind me of my favorite scones from Diamond Head Market & Grill in Kapahulu.  I can finally savor these scones when I go back to Hawaii in less than three months!  In the meantime, I made some homemade version of these with the abundance of blueberries I've picked this summer. It was a sticky mess to make but it was well worth it. These are best eaten warm after they're baked. You can refrigerate the rest and reheat it in the microwave for about 15-20 seconds.

Blueberry Cream Cheese Scones
Makes 8 scones

Ingredients:
2 cups all-purpose flour
1/4 cup sugar
1 T baking powder
3/4 tsp salt
6 T cold unsalted butter, cut in pieces (I grated the butter)
1 1/2 cups frozen blueberries
1/3 cup buttermilk
2 large eggs, lightly beaten
2 oz. cream cheese, cut into little pieces

Method:
Preheat oven to 400 degrees, with rack in center. Combine butter, flour, sugar, baking powder and salt in a bowl and cut with a pastry blender or two butter knives until crumbly. In a separate bowl, stir egg and buttermilk until well combined. Make a well in the center of dry ingredients, and stir in cream mixture until dough forms into ball. Gently fold in blueberries and cream cheese. Spoon mounds of dough onto ungreased baking sheet, and press lightly to flatten. Tuck in berries and cream cheese as much as possible. Bake until golden brown, 18-20 minutes. Transfer scones to wire racks to cool.

Adapted from here and there.

Tuesday, August 2, 2011

Blueberry Almond Coffeecake


I went blueberry picking this past weekend and picked over six pounds of blueberries!  Lucky me, I live close to two blueberry farms only a few miles away.  At only $1.25 per pound, it was totally worth the labor.  Blueberries keeps well in the freezer so I stored some in Ziploc bags and froze them for future uses.


Hubby found a blueberry muffin recipe and decided to bake us some goodies! We didn't have enough butter so we halved the recipe.  Also, we didn't have a stand mixer and the hand-held mixer worked just fine.  These were perfect for Monday morning breakfast!

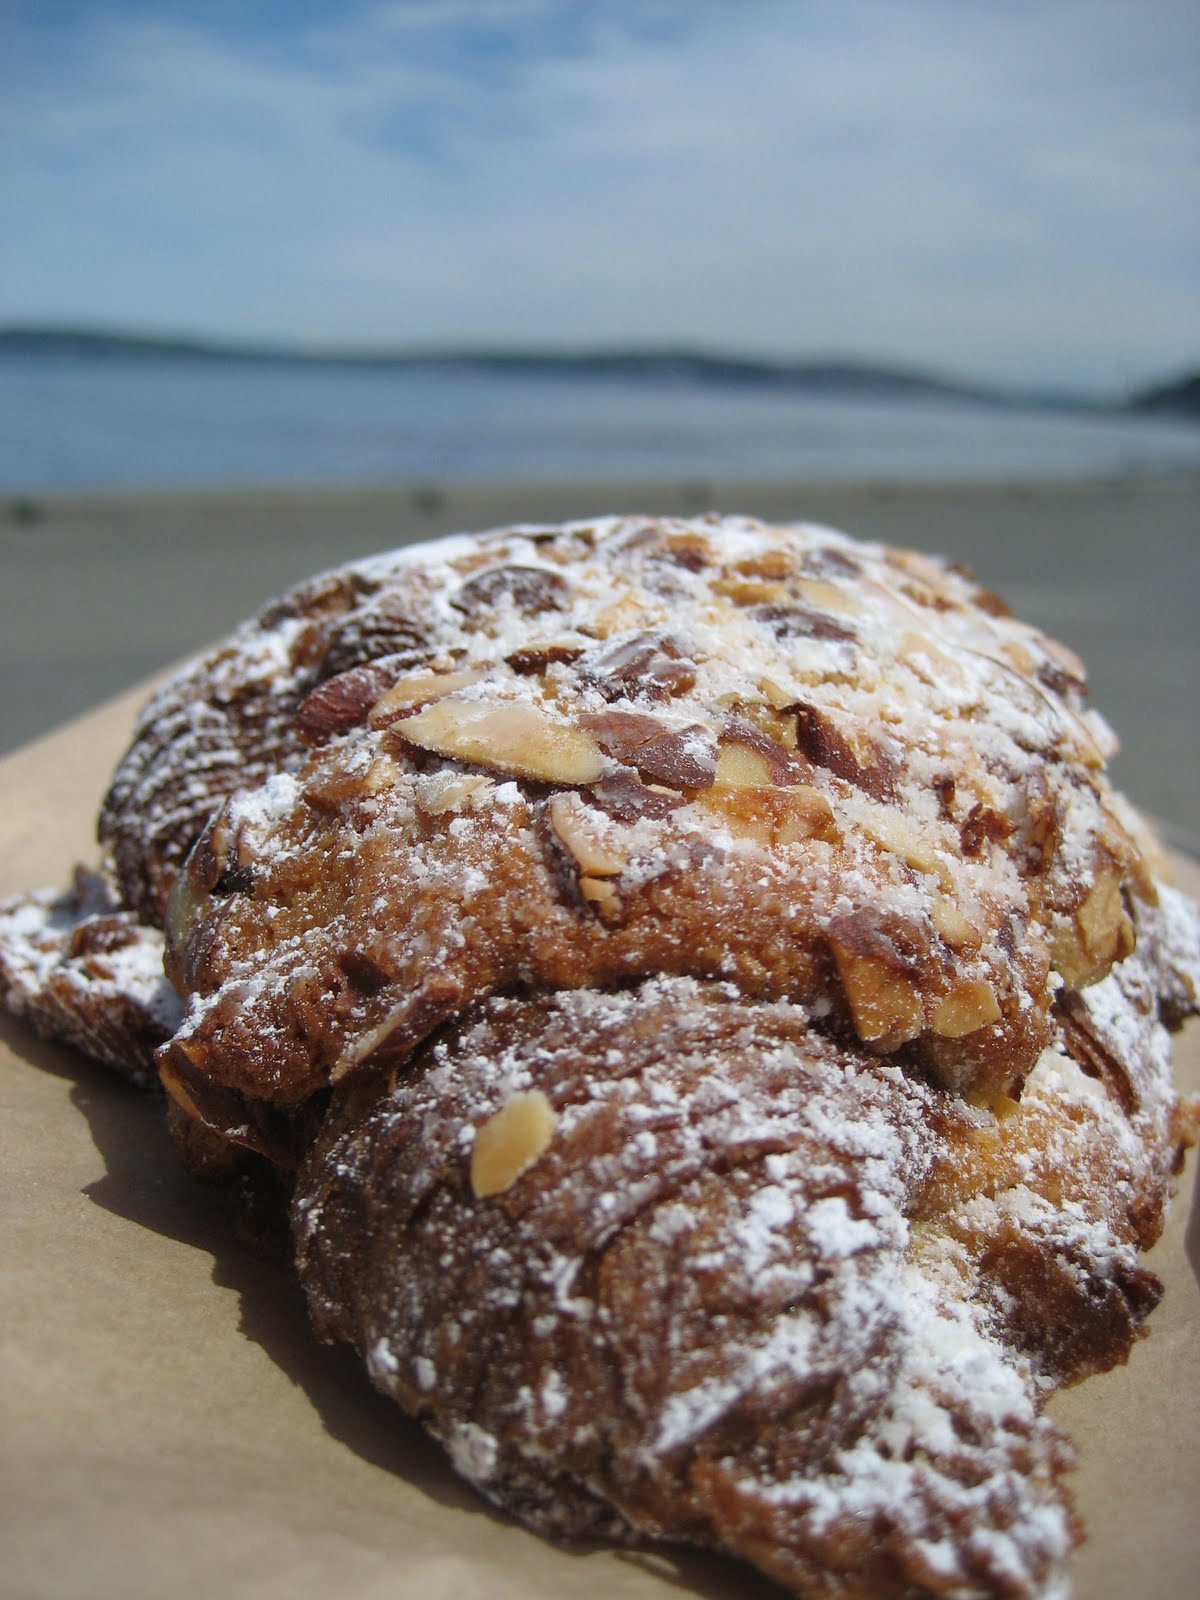
Everlasting Blueberry Almond Coffeecake
From Hungry Rabbit

Yields 12 individual coffeecakes

Streusel Ingredients:
1/2 cup unbleached all-purpose flour
1/4 cup slivered almond
1/2 cup packed light brown sugar
2 T granulated sugar
1/4 tsp ground cinnamon
1/8 tsp table salt
4 T unsalted butter (1/2 stick), cut into 8 pieces, softened

Cake Ingredients:
1 cup unbleached all-purpose flour
1/2 cup almond flour
1-1/2 tsp baking powder
10 T unsalted butter (1-1/4 stick), softened but still cool
2/3 cup granulated sugar
1/2 tsp table salt
1 tsp grated lemon zest
1 tsp vanilla extract
1/2 tsp almond extract
2 large eggs, room temperature
4 cups fresh blueberries

Directions:
1. For the streusel: In the bowl of a stand mixer fitted with paddle attachment, combine flour, almond, sugars, cinnamon, and salt on low speed until well combined and no large brown sugar lumps remain, about 45 seconds. Add butter and mix on low until mixture resembles wet sand and no large butter pieces remain, about 2-1/2 minutes. Spread streusel out onto a small tray (do not press to compact) and freeze for 30 min. Wipe bowl clean for cake preparation.

2. For the cakes: Adjust oven rack to lower-middle position; heat oven to 350 degrees. Line standard muffin pan with paper liners.

3. Whisk flours and baking powder in small bowl to combine; set aside. In the stand mixer fitted with paddle attachment, cream butter, sugar, salt, and lemon zest at medium-high speed until light and fluffy, about 3 minutes; scrape down bowl. Beat in vanilla and almond extracts until combined, about 30 seconds. With mixer running at medium speed, add eggs one at a time; beat until partially incorporated, then scrape down bowl and continue to beat until fully incorporated (mixture will appear broken).

4.With mixer running on low speed, gradually add flour mixture; beat until flour is almost fully incorporated, about 20 seconds. Stir batter manually with rubber spatula, scraping bottom and sides of bowl, until no flour pockets remain and batter is homogenous; batter will be thick.  Gently fold in blueberries with rubber spatula until evenly distributed.

5. Transfer batter to prepared muffin cups; with small off-set spatula or spoon, spread batter evenly to cup edges, gently pushing in to fill all gaps. Remove streusel from freezer, break up in to small chunks with hand and sprinkle streusel evenly over batter. Bake until deep golden brown and toothpick or wooden skewer inserted into center of cake comes out clean, about 35 minutes. Cool until just warm or to room temperature, about 1 hour.

Thursday, July 28, 2011

Napa Cabbage Kimchi


At last, I mastered the art of making napa cabbage kimchi!  Or something like that.  For years, I've tried to make my own kimchi at home and it always turned out mediocre.  Then I finally found a recipe that sounds close to the real deal and I tried making it.  I was really happy with the results.  Now I'll never have to buy expensive kimchi and I can make extra to share with family and friends!

This recipe uses the whole cabbage fermenting method.  I wanted to make it easier to serve and mix with the kimchi paste so I cut the cabbage into bite-sized pieces before brining it.  I skipped the first five steps and followed the instructions from her Easy Napa Cabbage Kimchi recipe instead.

Napa Cabbage Kimchi
From Aeri's Kitchen

Main Ingredients:
1 large napa cabbage (4 lb)
2 cups Korean radish
1 cup garlic chives
5 green onions
3/4 onion
2 hot peppers

Brine Ingredients:
10 cups Water
½ cup coarse sea salt (for salt water)
⅔ cup coarse sea salt (for sprinkling)

Sauce Ingredients:
2 cups water + (3 T water and 3 T sweet rice flour)
¼ sweet apple + ¼ onion
1¼ cup coarse red pepper powder
1 - 2 T sugar
¼ - ⅓ cup fish sauce
3 T garlic, minced
½ T ginger, minced
½ T salt
2 T sesame seeds

Directions:
  1. Remove any bad parts from the napa cabbage.
  2. Divide the napa cabbage into 4 pieces. 
  3. In a huge bowl, combine 10 cups of water and ½ cup coarse sea salt to make salt water. Stir until the salt is dissolved.
  4. Prepare ⅔ cup coarse sea salt. Divide the salt evenly for 4 pieces of cabbage. Sprinkle the salt inside each leaf. Put more salt on the thicker parts than the thinner parts. This step is important to make kimchi. The right amount of salt and time to marinate the cabbage will change the results of your kimchi.
  5. Dip the cabbage in the salt water. Put something heavy (like a big pan full of water) on top of the cabbage to keep them under the brine. That will help the cabbage to get salted better. Leave it for 4 to 5 hours until the cabbage leaves become a little soft.
  6. Rinse the salted cabbage twice in water.
  7. Drain the water, and set it aside for about 2 hours until more of the water drips out or you can squeeze the water out.
  8. Mix 3 T of sweet rice flour and 3 T of water.
  9. In a pan add the mixture and 2 cups of water. Boil it until it makes bubbles on medium. Keep stirring it so that it will not stick to the bottom.
  10. Cut the radish very thinly into 2-inch lengths.
  11. Cut 5 green onions the same length as the radish.
  12. Cut the garlic chives into 1½-inch pieces.
  13. Cut 2 hot peppers thinly and slice ¾ of an onion thinly.
  14. Grind ¼ of an onion and ¼ of a sweet apple.
  15. In a big bowl, add the rice flour mixture, 1¼ cup of red pepper powder, and 2 cups of radish. Mix everything together.
  16. Add the rest of the ingredients: chopped onion, hot peppers, garlic chives, green onion, onion & apple mixture, 1-2 T sugar, ¼ - ⅓ cups fish sauce, 3 T minced garlic, ½ T minced ginger, and 2 T sesame seeds. Mix all of the ingredients well. Taste it and adjust taste, adding more salt if needed.
  17. Spread some of the mixture into each leaf of the cabbage. Make sure all of the surfaces get covered in the sauce.
  18. Put the kimchi in a glass jar or container. Keep the kimchi at room temperature for about a day, then put it in the refrigerator. It will take several days to a week until it is properly fermented depending on your refrigerator’s temperature.
Eat your kimchi with rice or as a side.  I made kimchi fried rice because it's so easy and simple to make.  All you need is chopped kimchi, overnight rice, green onions, kochujang, sesame oil, and a fried egg.  Sometimes I like to add spam to my kimchi fried rice.  So ono!

Monday, July 25, 2011

Honey Roasted Almonds


Lately we've been obsessing over almonds.  They are cholesterol-free and low in saturated fats and provide lots of fiber and protein to give you that "full" feeling and keep your energy up.  I even recommended this to my mom because she was complaining of feeling tired all the time.  I wonder if it's helping.

I like to buy raw almonds in bulk and roast it myself.  Saves money and you can control the amount of salt, sugar, or whatever ingredients you like to turn this into a heart healthy snack.  I found this recipe on cooks.com and it's super easy to make.

Roasted Honey Almonds

2 cups raw almonds
2 T honey
2 T water
2 T oil (I used canola)
1/4 cup sugar
1/2 tsp salt

Preheat oven to 350 degrees and bake the almonds on a baking sheet lined with foil, for about 10 minutes.  Stir occasionally so they don't burn. Set aside and let cool.  In a small bowl, mix the sugar and salt together.  In a medium sized sauce pan, add honey, water and oil, mix and bring to a boil. Stir in the almonds until all of the liquid is absorbed. Transfer the nuts into a medium bowl and toss with the sugar mixture.  Spread back on to the aluminum lined baking sheet and let cool.

Thursday, July 21, 2011

Green Curry Chicken


Coconut milk finally went on sale at Uwajimaya several weeks ago so I made green curry chicken for dinner.  I usually make red or yellow curry since I usually have ingredients for those dishes on hand.  I switched it up and used green curry instead. I found a small 4 oz. can of green curry paste to experiment with and it was enough to cook for two 4 serving meals. Most recipes call for kaffir lime leaves but I couldn't find it anywhere so I substituted with lime zest instead.  

Green Curry Chicken (serves 4)
Recipe adapted from here and there

Ingredients:

1 lb. chicken thighs or breasts, cut into bite-sized pieces
2 T green curry paste
1 can coconut milk
3 kaffir lime leaves (I used zest of one lime)
1 cup bamboo shoots
1/2 cup frozen peas*
1/4 cup Thai basil
1-2 T fish sauce
1 T palm sugar
1 T vegetable or canola oil
crushed peanuts (optional)

Directions:

1. Saute the green curry paste with oil over medium heat until fragrant, mix in half of the coconut milk and let simmer for about 2-3 minutes.
2. Add the chicken and continue cooking until chicken is almost done.
3. Add the remaining coconut milk, kaffir lime leaves, palm sugar and fish sauce, and bring to a boil.
4. Add the bamboo shoots and frozen peas and cook for 4-5 minutes or until the bamboo shoots are softened.
5. Stir in the basil and remove from the heat. Serve over rice and top with crushed peanuts if desired.

*I also made this dish using eggplants instead of peas which I think goes very well with green curry.  It just took a little longer to prepare because you need to cook the eggplants first until they soften before adding to the curry.

Tuesday, July 19, 2011

4th of July

Lucky me, hubby had a day off on freedom day.  We took this opportunity to pig out in Seattle and enjoyed the sunshine.  First things first, breakfast.

Breakfast Menu
We went to Toulouse Petite in Queen Anne for breakfast happy hour. Most dishes on their breakfast menu were priced at $7.50 between 8am-11am.  We ordered the Rustic Duck and Pistachio Terrine and Cured Pork Cheeks Confit Hash.  Apparently, the confit hash was featured on The Foot Network's fall season premier of 'The Best Thing I Ever Ate' and I have to agree, it was delicious!

Rustic Duck and Pistachio Terrine
Cured Pork Cheeks Confit Hash
After breakfast, we headed over to West Seattle and picked up my favorite, Twice Baked Almond Croissant, from Bakery Nouveau.


It's a very crunchy pastry filled with almond cream and topped with sliced almonds.  Since we've come such a long way, it would've been a waste not to try another item from their mouthwatering showcase.  So, hubby got the Chocolate Hazelnut Croissant.  It tasted like Nutella!  


Even though we were full, we couldn't resist.  We took our pastry and drove down to nearby Alki Beach to enjoy.   It's amazing how much we can eat!  

Twice Baked Almond Croissant
Chocolate Hazelnut Croissant


We later took a nice stroll along the beach to burn off some calories (yeah right).  I've never seen the beach as crowded as it was.  Mother Nature was good to us on this day and I thank her.
After getting our dose of Vitamin D, we headed back into town and did a little bit of shopping around Downtown Seattle and Pike Place Market.  Might as well take advantage of the free holiday parking, right?  Hubby would have never agreed to go shopping if it wasn't for my birthday the next day.  

We needed to recharge after all that walking and ended up back in Queen Anne for some frozen yogurt. Hubby had Menchie's when he visited Hawaii in 2009 and really liked their fro-yo.  Menchie's finally popped up in Seattle so we decided to head there for our final destination before heading home.


They had about a dozen different flavors and sample cups were available to try before you buy.  The yogurt and toppings bar was all self-serve so you can mix and match and fill up your cup with as much or as little as you like and you pay by weight.  I think it was 42 cents per ounce.


I can't remember what flavors we had but one of it I remembered was mango whip.  It was creamy and melt in your mouth wonderful and kudos to them for their colorful mochi toppings!


Say "hi" to Mr. Menchie!
The day didn't just end there.  We went home, relaxed for about 2 hours, and headed back out to meet my family for dinner at Cheesecake Factory to celebrate my turning of age.  Holy crap, it was happening, and now I am officially old.  My co-worker told me not to worry because my 30's will be my best years ever.  I'm not too optimistic about that but I'm not ruling it out either.  Hopefully, she's right.

Finally, to top off my weekend of indulgence, hubby surprised me with cupcakes from Cupcake Royale on my birthday the following day.


Triple Threat, Strawberry Velvet, Strawberry Dipped Chocolate,
Salted Caramel, Strawberry 66, Strawberry Shortcake
I love my birthday month because it's strawberry season and Cupcake Royale was featuring strawberry themed cupcakes!  My favorite was the Strawberry Shortcake with fresh strawberries baked into the cake topped with strawberry whipped frosting.  

Hungry yet? ;)

Wednesday, May 25, 2011

Steel-Cut Oatmeal


It's almost summer and it still feels like early Spring here in the Pacific Northwest.  How lucky are we?  Well, at least I can still eat hot cereal for breakfast thanks to our stubborn weather.  Winter is such a great time to enjoy a nice bowl of hot steaming bowl of oatmeal in the mornings.  I've never really appreciated oatmeal until last year.  I tried many varieties from the old-fashioned to instant oatmeal.  Of course, instant is the least healthiest because of the added sugars and preservatives that come in those convenient little packets.  I even tried to recreate McDonald's Fruit & Maple Oatmeal but my imitation has never come close to anything like it.  Then I discovered steel-cut oats.  It takes a little longer to prepare but it is totally worth the wait.  I usually cook up a batch on Sunday mornings so I can eat it throughout the week.  I just add a splash of milk to heat it up in the microwave.  My favorite combination are bananas and walnuts or dried cranberries and sliced almonds.  The combination of fruits and nuts tastes so good with oatmeal!  Of course, I kick it up with a bit of maple syrup or agave nectar to give it just enough sweetness.

Basics of cooking steel-cut oatmeal:
3-4 cups water (depending on how thick you want your oatmeal)
1 cup steel-cut oats

Bring the water to a boil and stir in the oats. Let the water and oats come back to a boil then reduce to medium-low heat. Let the oats simmer with the lid slightly ajar, stirring frequently so the oats doesn't stick to the bottom.  This will take 20-30 minutes depending on how chewy or soft you like your oatmeal.  Remove from heat and divide portions into individual bowls. Stir in your favorite toppings like milk, sweeteners, nuts, and fruits.  Makes about 4-6 servings.

Here's a tip - buy bulk and you'll save a ton of money because you can buy as little or as much as you like.  My local Wholefoods sells it for just $1.19/lb!

Monday, May 23, 2011

Zucchini Muffins


It's been a while since I baked so I decided to dust off my mixer and muffin pan for some yummy zucchini bread. I was looking back and noticed that I made zucchini bread when I first started this blog. I must have been very lazy at that time because I didn't post the recipe.  I couldn't recall where I found the recipe so I had to sort through all my printouts in my old recipe binder and tada!  I found it!  I've adapted the recipe to include whole wheat flour and less sugar.

Zucchini Muffins
Adapted from Joy Joy of Baking


1/2 cup walnuts, toasted and coarsely chopped
1 medium zucchini, grated
1/2 cup peeled and grated apple (about 1 large apple)
1 cup all-purpose flour
1/2 cup whole wheat flour
1 tsp baking soda
1/4 tsp baking powder
1/4 tsp salt
1/2 tsp ground cinnamon
1/4 tsp ground nutmeg
1/2 cup canola oil
3/4 cup granulated white sugar
2 large eggs
1 tsp vanilla extract
1/2 cup shredded coconut (sweetened or unsweetened)


Preheat oven to 350 F and place rack in center of oven. Coat each muffin cup with cooking spray or butter.

In a large bowl, whisk together the flour, baking soda, baking powder, salt, ground cinnamon, and nutmeg.

In a separate bowl, beat the oil, sugar, eggs, and vanilla extract until well blended (about 2 minutes). Beat in the grated zucchini and apple. Pour in the flour mixture, beating just until combined. Then fold in the nuts and coconut.

Distribute the batter equally into the muffin cups, filling them up to the top. Bake until the bread has risen and a toothpick inserted in the center comes out clean, about 25-30 minutes. Place on a wire rack to cool for about 5 minutes and then remove the muffins form the pan and let cool.

Makes about 12-14 muffins. (I had more batter than was needed for 12 muffins so I made a couple of mini muffins).

Wednesday, May 18, 2011

Spaghetti with Kale and Tomatoes


It's kale time again!

Spaghetti with Kale and Tomatoes
Adapted from Real Simple


Ingredients

6 oz whole-grain thin spaghetti
2 tablespoons olive oil
1/2 medium red onion, thinly sliced
4 cloves garlic, chopped
dried chili flakes
salt and black pepper
1 bunch kale, thick stems removed and loosely chopped
Roma and grape tomatoes
1/3 cup chopped roasted almonds
parmesan cheese

Directions

Boil water in a pot and steam the chopped kale for about 5-8 minutes; remove. Cook the pasta according to package directions in the same pot. Reserve ¼ cup of the cooking water and drain the pasta.

Meanwhile, heat oil in a large skillet over medium-high heat. Add onions, garlic, chili flakes, and salt and pepper to taste. Cook, stirring occasionally, until lightly brown, 4 to 5 minutes. Add the kale and cook, tossing frequently, until tender, 2 to 3 minutes. Add the tomatoes and cook, tossing frequently, until the tomatoes begin to soften, 1 to 2 minutes.

Add the pasta and reserved liquid to the kale mixture and toss to combine. Toss in almonds and garnish with parmesan cheese.

Serves 4

Saturday, May 7, 2011

A Simple Pizza Dough Recipe


I made a pretty darn healthy pizza last week. Can something like pizza even be healthy you ask?  It is to me if you are making the dough from scratch using whole wheat flour and topping it off with choke vegetables like tomatoes, mushrooms, asparagus, onions, and olives. Oh yeah, I also used the cilantro pesto I kept in the freezer from the batch I made in my previous post.

We enjoy making our own pizza at home because you get to customize it the way you want.  We even do pizza potlucks with my family to see what creations other people come up with. I've tried many pizza dough recipes and this one is foolproof. This recipe uses a KitchenAid stand mixer but since I don't have one I just kneaded it by hand and it turned out just fine.

The Best Pizza Dough
From Eat, Live, Run

Makes 2 large pizza doughs

Ingredients:

2 cups all purpose flour
1 1/2 cups whole wheat flour
1 tbsp olive oil
1 1/3 cup warm water
1 packet yeast
1.5 tsp sea salt

Method:

In a mixing bowl, combine the warm water and yeast.

Stir in the salt and flour and mix on medium high speed on your KitchenAid for 5 minutes. While the mixer is going, drizzle in the olive oil.

When the dough is soft and elastic, take out of the bowl, rub with olive oil and then place back in the bowl, cover with a dish towel and let rise for one hour.

After the dough has doubled in size, cut in half to make two large pizza doughs or make mini doughs. You can also freeze whatever dough you're not using in a freezer bag for another time. When you are ready for your pizza, roll out the dough, cover with your toppings and bake at 425F for 10-15 minutes.

Sunday, May 1, 2011

Cheap Date at Andaluca


Hubby and I went to Anadaluca for dinner last week as part of Seattle Restaurant Week. Over one hundred restaurants in the Greater Seattle area offered a 3-course dinner menu for $28 with some even offering a 3-course lunch for $15. I entered a contest during the promotion and won two $50 gift certificates; one to Andaluca at the Mayflower Hotel and the other to 50 North. I was a little disappointed to find out that they just randomly sent me 2 gift certificates instead of one that I can use at any participating restaurants.  But free is free.  I can't complain, right?

Andaluca offers Mediterranean-style cuisine and is known for their assortment of small plates or pintxos. We don't venture to Downtown much unless we have out of town guests or meeting up for a night out with some friends. We were seated right away when we arrived at Andaluca 15 minutes before our reservation. The restaurant atmosphere was quiet and relaxed at first but it gradually grew busy halfway into dinner service.

For the appetizer, we had a Tuscan tomato bread soup with basil crème fraiche and tiny croutons ($6) and a Pear Salad with mixed organic greens, stilton cheese, hazelnuts and balsamic vinaigrette ($9).  These were very basic.


We had the choice of 3 pintxos for the entrées. I had the Roasted Mushroom & Chevre Risotto ($9), Moruno Chicken Skewer with marcona almonds & saffron aioli ($7), and Mini Crab Tower with avocado, palm hearts, and gazpacho salsa ($8). They were pretty good except for the crab dish which was way too salty. Hubs had the Beef Tenderloin Skewer with baby red potato and pears ($15), Potato Croquette with yukon gold potato, sour cream, idiazabal cheese, and panko ($5), and the Lamb Dolmas with basmati rice, dill, pine nuts, and lemon aioli.


For dessert, hubby had the Petit Liquid Chocolate Cake with hazelnut gelato, and espresso syrup ($7) and I got the Cabrales Cheesecake with apricot fig jelly, red wine & honey reduction, graham cracker hazelnut crust and hazelnut tuile ($7). Yuck, turns out I'm not a big fan of cabrales cheese.


The entire check could have easily totaled over $70 but we ended up paying $20 after the discount, plus taxes and tips.  I likey!

Friday, April 22, 2011

Daikon Radish Cake


My mother-in-law makes the best Chinese turnip cake or daikon radish cake.  It's usually a dim sum staple and tastes delicious pan fried to a a golden crisp on the outside after it's steamed.  I saw daikon on sale at the grocery store and thought of this dish.  I had most of the ingredients at home and it looked easy to make so I decided to give it a try.  The only thing I did not have was shiitake mushroom which hubs doesn't like anyway so I skipped it.

Daikon Radish Cake
From Nook and Pantry

Ingredients:

2 1/2 - 3 cups coarsely shredded daikon (around 1.5 - 2 lbs)
1 Chinese sausage, finely diced
3 dried shiitake mushrooms, finely diced (I skipped this)
2 Tbsp small dried shrimp, finely diced
1 - 2 green onion stalks, chopped
2 cups rice flour (do not use glutinous rice flour)
1 3/4 cups water
salt and white pepper
oil

Method:

Rehydrate the dried mushrooms and dried shrimp by soaking them in hot water for about 15 minutes. Peel and shred daikon; set aside. Mix rice flour with 1 cup of water. Heat 2 tsp of oil in a skillet or wok and stir fry chinese sausage, shiitake mushrooms, shrimp, and green onion for 2 to 3 minutes. Add daikon, 3/4 cup water, 1-2 tsp salt, 1/4 tsp white pepper. Bring to a boil then remove from heat. Stir in the rice flour water mixture until it thicken then pour into a well greased round or square cake pan. Steam over medium high heat for about 50 minutes. Cool or chill overnight. After cooling, cut the cake into 1/4 inch thick slices and pan fry both sides until golden brown. *Serve with chili soy sauce.

*You can also serve the crispy daikon cake with eggs.  My husband grew up eating homemade daikon cakes this way.  Just beat an egg with salt and pepper to taste.  Then while the cakes fry on both sides, pour the egg over the daikon and let it set, turning them over so that they are coated with the egg.  Transfer to a serving plate once the the egg is set and cooked through and dip in sauce.

Sunday, April 17, 2011

Is Kale the New Spinach?


Remember the first time you had broccoli or spinach as a kid?  I don't know when or how it happened but at some point while growing up, I finally appreciate all the health benefits I reap from eating these leafy green plants.  I'm trying to eat my 5 a day as much as possible but rising food prices is making it hard to eat healthy these days.  My sister and I drove by this produce stand yesterday and I was so glad that we turned the car around to check it out.  I could hardly believe my eyes when I saw kale for
$0.89 a bunch, onions for $0.25/lb, and zucchini for $0.69/lb, just to name a few.  I was so happy to go home with a $6 bag full of fruits and vegetables!  It totally made my day.  

I've been hearing a lot of rave about kale these days and it really got me interested.  Of course, I can never buy them because they are expensive and rarely go on sale.  I was really excited when I brought the kale home and decided to cook them right away for dinner last night.  Now it's my turn to rave about it.  Did you know that kale is chock full of antioxidants, vitamins, and calcium compared to spinach? This is the meca of all superfoods!  This is how I hype up vegetables so my husband will eat them.

The vegetable itself is kind of tough and bitter so I've found out that you only eat the leafy part and discard the stems and center ribs.  They are often times sauteed or steamed and even baked into crispy kale chips.  I decided to sauté them with garlic and onions with some chili flakes and paprika seasoning.

Sautéed Kale with Garlic and Onions
Adapted from here and there

1 pound kale, tough stems and center ribs discarded and roughly chopped
2 tablespoons olive oil
1/2 onion, chopped
2 garlic clove, minced
Pinch of red pepper flakes
1/4 tsp paprika
1/4 tsp salt

Cook kale in salted boiling water for about 5-10 minutes, then drain.  Heat olive oil in skillet on medium high heat and sauté onions and garlic until tender.  Add red pepper flakes and paprika.  Stir in kale for a couple of minutes and add salt to taste.

Thursday, April 14, 2011

Tiramisu Layer Cake


For my sister's 26th birthday, I made a tiramisu layer cake from scratch!  Well, almost.  The recipe I used called for box cake mix instead of lady fingers found in this traditional Italian dessert.  It turned out pretty good but I would do it differently next time by making sponge cake layers.  I think it would work very well to soak up the coffee liqueur mixture.

Tiramisu Layer Cake
From All Recipes with a few tweaks

Cake Ingredients:
1 (18.25 ounce) package moist white cake mix (I used Duncan Hines)
2 teaspoon instant coffee powder
1/4 cup brewed coffee
2 tablespoon coffee flavored liqueur (Kahlua)

Filling Ingredients:
1 (8 ounce) container mascarpone cheese
1/2 cup confectioners' sugar
4 tablespoons coffee flavored liqueur

Frosting Ingredients:
2 cups heavy cream
1/4 cup confectioners' sugar
3 tablespoons coffee flavored liqueur (Kahlua)
cocoa powder

Preheat oven to 350F. Grease and flour 3 (9 inch) pans. Line bottom of pans with parchment paper.  

Prepare the cake mix according to package directions. Divide one third of batter into a pan. Stir instant coffee into remaining batter; pour into remaining pans.  

Bake in the preheated oven for 20 to 25 minutes, or until a toothpick inserted into the center of the cake comes out clean. Let cool in pan for 10 minutes, then turn out onto a wire rack and cool completely. 

In a measuring cup, combine brewed coffee and 2 tablespoon coffee liqueur; set aside.
For the filling: In a small bowl, using an electric mixer set on low speed, combine mascarpone, 1/2 cup confectioners' sugar and 4 tablespoons coffee liqueur; beat just until smooth. Cover with plastic wrap and refrigerate.

For the frosting: In a medium bowl, using an electric mixer set on medium-high speed, beat the cream, 1/4 cup confectioners' sugar and 3 tablespoons coffee liqueur until stiff. Fold 1/2 cup of cream mixture into filling mixture.

To assemble the cake: Place one coffee-flavored cake layer on a serving plate. Pour one third of reserved coffee mixture over cake, then spread with half of the filling mixture. Top with the plain cake layer, pour another third of the coffee mixture over the second layer and spread with the remaining filling. Top with remaining coffee-flavored cake layer; pour remaining coffee mixture on top. Spread sides and top of cake with frosting. Place cocoa in a sieve and lightly dust top of cake. If you have leftover frosting, you can use it to decorate the cake like I did! Refrigerate at least 30 minutes before serving.

    Friday, April 8, 2011

    Cilantro Pesto


    If you are like me and do not want to spend a chunk of money on pine nuts and basil leaves for homemade pesto, this cilantro pesto recipe is a great alternative.  Cilantro is abundant now and you can get it for super cheap.  We usually pick some up when we shop at our local Asian supermarket for less than 50 cents a bunch.  What a deal!

    The recipe makes around one cup and whatever you don't use, you can freeze.  Whoever thought of this is ingenious.  Just fill an ice cube tray with pesto, cover with plastic wrap, freeze, remove from tray, and place in a freezer bag for future use.  I made pizza the other day and used the pesto for my sauce base and it was yummy!

    Cilantro Pesto
    Adapted from an article on The Washington Post

    Ingredients:
    1/3 cup walnuts (I'm going to try blanched almonds next time)
    1-2 cloves garlic
    1 large bunch cilantro, roots and large stems removed
    1 T lime juice
    1/4 cup olive oil
    Salt and pepper to taste
    1/4 grated Parmesan (optional)

    Place nuts and garlic in food processor and process until finely chopped.  Add cilantro, lime juice, salt and pepper until well blended.  With the food processor running, gradually add oil.  Add more, if needed, to desired consistency.

    Friday, April 1, 2011

    Making Homemade Pork and Shrimp Wontons


    Wonton noodle soup is a budget-friendly dish to make especially in this tight economy.  Growing up, my sisters and I would gather around the table and help my mom wrap wontons.  It was a very bonding experience.

    Making wontons can be time consuming but it's super easy to make.  I like to make a lot and freeze the rest for a quick meal whenever I feel like adding wontons to my soup noodles.  You can eliminate the shrimp and just use pork or vice versa if you feel like splurging.  I like my wontons with shrimp so I use 50/50 pork to shrimp ratio.  The size of the shrimp does not really matter since you have to chop it up anyway.  If you are unsure of how to wrap the wontons, there are tons of videos available online.

    Pork and Shrimp Wonton Recipe
    Makes about 40-50 wontons

    Ingredients:
    1/2 lb. ground pork
    1/2 lb. shrimp, shelled, deveined, and chopped
    2 stalks green onions, finely chopped
    1 tsp ginger, minced
    1 T soy sauce
    1 tsp sesame oil
    1 tsp Xiao Hsing wine or rice cooking wine
    1 tsp ground white pepper
    1/4 tsp sugar
    1 tsp cornstarch

    1 package wonton wrappers
    green onions, chopped
    Chicken broth

    In a large bowl, combine all ingredients and mix well.  Assemble wontons one at a time by placing a teaspoon of filling in the middle of the wonton wrapper.  Moisten the edges with water and fold to form a triangle.  Press firmly to secure edges.  Brush one tip of the triangle with water and bring the two corners together to finish off the wonton.  Repeat until all wrappers are used.

    Bring a pot of water to a boil.  Add the wontons making sure not to overcrowd them.  Let the wontons boil for about 4-6 minutes until they float to the top and are cooked through.  Remove wontons with a sieve or slotted spoon and transfer to a bowl.  Ladle hot broth over wontons and garnish with green onions.

    Optional:  Serve with Hong Kong-style egg noodles and bok choy or any type of Chinese greens for wonton mien (noodle soup).

    To freeze:  Put wontons in a single layer on a cookie sheet or baking dish, making sure they do not touch.  When frozen, gather them up and put in a freezer bag.

    Wednesday, March 30, 2011

    Vietnamese Steamed Meatloaf


    My mom used to cook a lot for us when were growing up.  One of the things she made was this Vietnamese pork dish that resembled a meatloaf but even better.  I always looked forward to eating this with pan fried pork chops served over broken rice.  I never realized how simple it was to make this until I started making it myself.

    Vietnamese Steamed Meatloaf (Cha Trung Hap)
    Adapted from Wandering Chopsticks

    Ingredients:

    1 lb. lean ground pork
    1 bundle bean thread vermicelli noodles
    1/3 cup dried wood ear fungus
    1 carrot, grated
    3 large eggs (reserve 2 egg yolks and beat the remaining eggs and egg whites)
    1 T fish sauce
    1/2 tsp salt
    1/2 tsp pepper
    sugar
    cilantro for garnishing

    Directions:

    Soak vermicelli noodles and wood ear fungus together or in separate bowls for 15 minutes in hot water until softened. Drain and roughly chop them up on cutting board.  Set aside.

    In a medium bowl, add ground pork, vermicelli noodles, wood ear fungus, grated carrots, 1 egg and 2 egg whites, fish sauce, salt, pepper and a dash of sugar.  Mix until ingredients are evenly distributed.

    Put the pork mixture into a loaf pan or heatproof bowl.  Beat the reserved egg yolks and pour it evenly over the meat mixture.

    Cover and steam for 25-30 minutes on medium heat until firm and cooked through.  Remove the meatloaf from the steamer and cut into slices.  Serve on top of white rice and garnish with cilantro and nuoc cham (Vietnamese dipping sauce).